
An overlanding conversion isn’t just about buying a bunch of gear and bolting it onto your truck or SUV. It’s about being prepared, self-sufficient, and knowing how to build your rig in a smart, progressive way. Too many first-timers blow their budgets on gear they don’t need right away, only to find out the build is overloaded and their wallet is drained. The key? Build in stages, dial in your setup trip by trip, and focus on what you actually need for the type of travel you’re doing.
Let’s break it down stage by stage so you can figure out where you’re at, and what’s worth doing next.
Stage 1: Essentials (Baseline Reliability & Safety)
Before you start dreaming about rooftop tents and long-range tanks, you’ve got to nail the basics. Your rig has to be reliable first. That means fresh fluids, strong brakes, healthy belts and hoses, and a solid battery. Don’t even think about heading out into the backcountry if your vehicle isn’t squared away mechanically. You’ll be in remote locations with little to no civilization, so you wouldn’t want anything to go wrong and strand you.

Tires are next. Invest in a good set of all-terrains, and always carry a full-size spare. M/T tires may be more capable on really challenging surfaces, but they are seriously uncomfortable on the pavement; and remember, you’ll need to log big miles on the paved surface to get to the trails. Pair your new set of tires with a portable air compressor and a tire repair kit so you’re not stranded from something as simple as a tire blowout.
For recovery gear, start simple: rated recovery points, a decent recovery strap, traction boards, and a shovel will cover 90% of early problems. Finally, carry the safety basics: first-aid kit, fire extinguisher, a decent tool roll, and some way to navigate when cell service drops off. A GPS app with offline maps plus an old-school paper map as backup would be a reliable duo.
Stage 1 isn’t glamorous, but it’s what makes sure you come back from your trip. Nail this, and you’ve already got a solid weekend-ready overland vehicle.
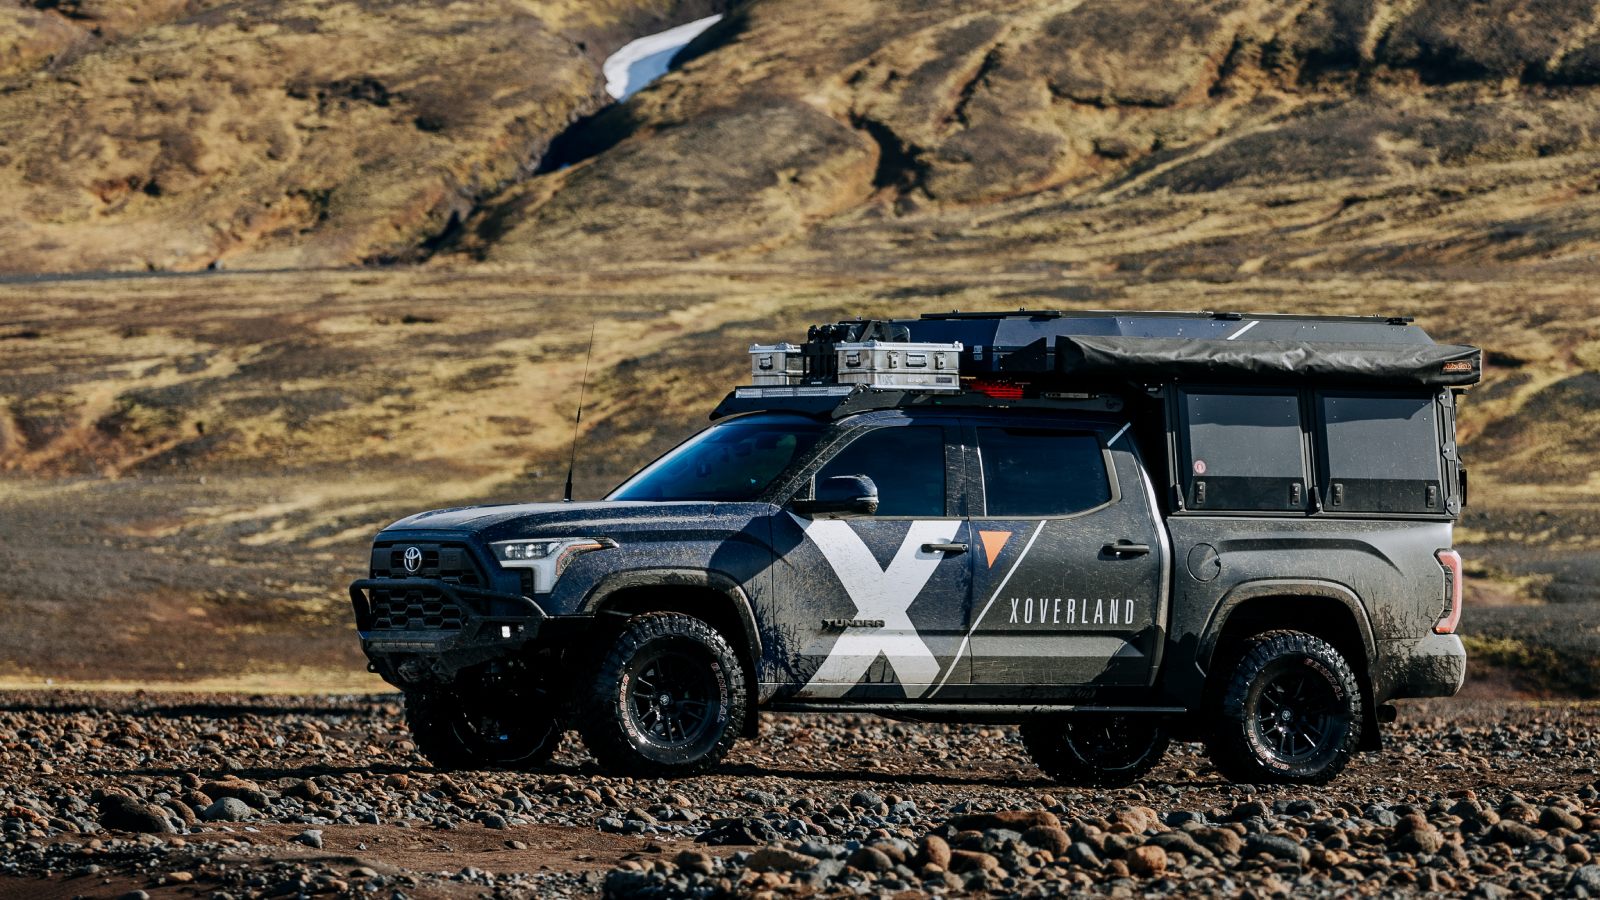
Stage 2: Capability & Comfort (Weekend Overlanding Setup)
Once your rig is reliable and safe, it’s time to level up. This stage is about capability and comfort; the upgrades that make overlanding easier, safer, and more fun. Suspension is a big one: a mild lift and heavy-duty shocks will help carry the extra gear while smoothing out rough trails and giving you more ground clearance. Add some underbody protection like skid plates and, if you plan on running rocky terrain, rock sliders are a smart investment too.
This is also where you start building out your camping setup. Whether you go with a ground tent, a rooftop tent, or a sleep platform in your rig, having a reliable place to sleep comfortably is non-negotiable. Food and drink matter too, so think about a 12V fridge or a heavy-duty cooler, plus a compact cooking setup. A roof rack or bed rack helps with hauling gear, and extra fuel or water storage gives you range and flexibility. Auxiliary lights—like a light bar or ditch lights—make camp setup and night driving way easier.

By this point, you’ve got a weekend-ready rig. And honestly, you don’t have to jump to Stage 3 or 4 unless your trips demand it. Most weekend overlanders live comfortably in Stage 2, and many stay here for years without ever feeling underbuilt.
Stage 3: Extended Range & Self-Sufficiency (Remote Travel Ready)
Stage 3 is where you start thinking about real independence and longer trips. If you’re heading into the backcountry for several days—or you’re going solo—you need gear that keeps you self-sufficient. A dual-battery system or portable power station lets you run fridges, lights, and electronics without draining your starter battery. A winch is a must, especially if you’re solo, paired with a recovery kit that includes gloves, shackles, and a snatch block.
Storage becomes more critical as trips get longer. Drawer systems or built-in cargo solutions keep gear organized and stop it from flying around on the trail. Water management is another upgrade at this level: an onboard water tank and a filtration system mean you can resupply from streams and lakes instead of lugging extra jugs. Communication also gets more serious. GMRS or HAM radios are solid options, and a satellite communicator or inReach is a good insurance when you’re out of cell range.
With Stage 3, you’re basically expedition-ready. You can roll into remote areas, stay for days, and still have the systems in place to get back home safely.
Stage 4: Expedition-Level (Nice-to-Haves / Specialty Upgrades)
This stage isn’t for everyone. It’s the full-send build, the kind of stuff you see on rigs that cross continents or tackle weeks-long expeditions. Think long-range fuel tanks, onboard air systems, advanced suspension setups, full underbody armor, and custom storage solutions with slide-outs and fridge mounts. Solar panels, diesel heaters, and hot water systems add serious comfort, but they also add weight, complexity, and cost.
If you’re planning international overland trips, this level makes sense. But for most people exploring trails in the U.S., Stage 4 is more of a dream build than a necessity.
Building Smart: Keep It Balanced
The biggest mistake people make when prepping for overlanding is going too big too fast. Focus on the essentials first, then upgrade as your trips demand. If you’re mostly running weekend adventures close to home, a Stage 2 rig is more than enough. If you’re tackling remote backcountry routes or heading into the desert for a week, then Stage 3 makes sense. And if you’ve got the itch for a multi-continent trip, sure, start dreaming about Stage 4.

Remember, overlanding is about the journey, not the shopping list. Build in stages, learn what works for you, and refine your rig with each trip. That way, every upgrade has a purpose, and your setup grows alongside your adventures.
The Best Mod for Any Overlanding Build: Fn Tuned Throttle Response Controller
Let’s talk about that one mod every overlander should slip into their build early, even if you're just planning weekend runs. The Fn Tuned Throttle Response Controller is the ultimate mod for your overlanding build.
Fn Tuned eliminates throttle lag, and that drive-by-wire lag is the last thing you want on a heavy rig that is responsible for anything on your remote adventures. It connects to the gas pedal assembly after a 15-minute plug & play install, and modifies the stock gas pedal signal to boost the sensitivity.

Your overland vehicle may have lots of electronic devices and add-ons on the dashboard, and Fn Tuned is completely wireless, so it won’t cause any more clutter. Just stash it under the dash and control it with your mobile phone!
Why every overlander needs Fn Tuned:
-
Customizable Performance: Four driving modes—Fn Slow, Fn Cruise, Fn Fast, and Fn Send It—each with nine tweakable sensitivity levels (36 total throttle response settings). Whether you’re lugging gear, crawling through mud, or hitting highway speeds, you dial in the exact throttle feel you want.
-
Bluetooth smartphone control: No extra dashboard clutter. Just use your phone to swap modes or fine-tune response—factory stealth, all the way.
-
Plug-and-play installation: No hack jobs, no cutting wires. Just unplug the stock pedal harness, plug in the module with the supplied OEM-quality harness, and go. The installation takes under 15 minutes.
-
Warranty safe and reversible: Leaves zero trace on the ECU. Your dealership visits will be safe, and your warranty stays intact.
-
Extra perks for overlanding: Fuel-saving and off-road-enhancing Slow mode, no more jerky power delivery with more agressive modes, and even an Anti-Theft mode to lock your gas pedal when you leave your rig unattended in a remote area.
Click here to order your Fn Tuned throttle response controller, and start your build with one of the simplest and best overlanding mods on the market!